Did you know there’s a way to classify texts without having to leave Excel? We have paired up with SeoTools for Excel, a Swiss army knife Excel-plugin, which offers a tailored “Connector” for all uClassify users.
In this blog post, we will show how SeoTools allows you to classify lists of texts or URLs with the classifiers of your choice, and having the results ready for analysis in a matter of seconds.

Don’t be worried if your Excel spreadsheet doesn’t look as the example above. The extra ribbon tab “SeoTools” is added when SeoTools for Excel is installed. At the end of this post you find all the links necessary to setup your uClassify account.
Selecting a classifier

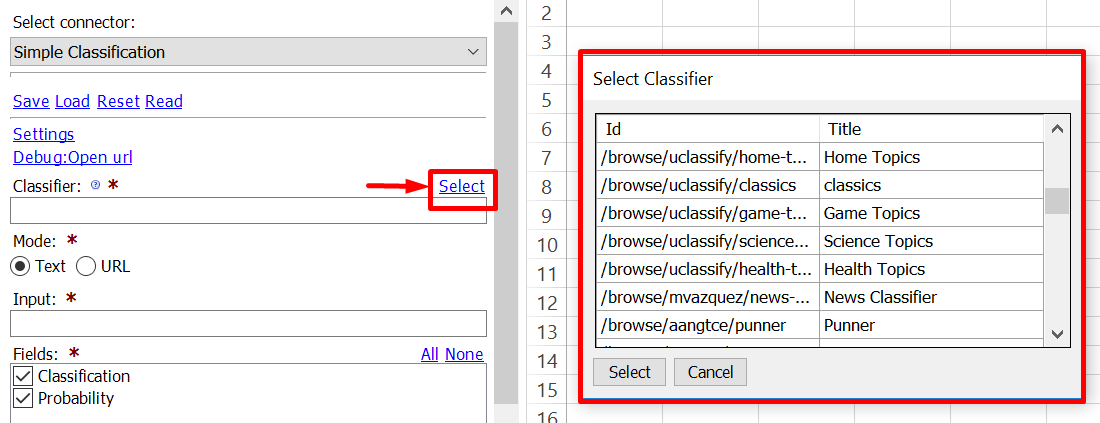
The uClassify Connector is, as the name suggests, connected to uClassify library. Clicking on “Select” opens a window of all available classifiers. It is also possible to choose input type (Text or URL) and if the results include classification and probability.

When you are satisfied with your settings, click “Insert”, and SeoTools will generate the data in columns A and onwards.
Save time and automate the process
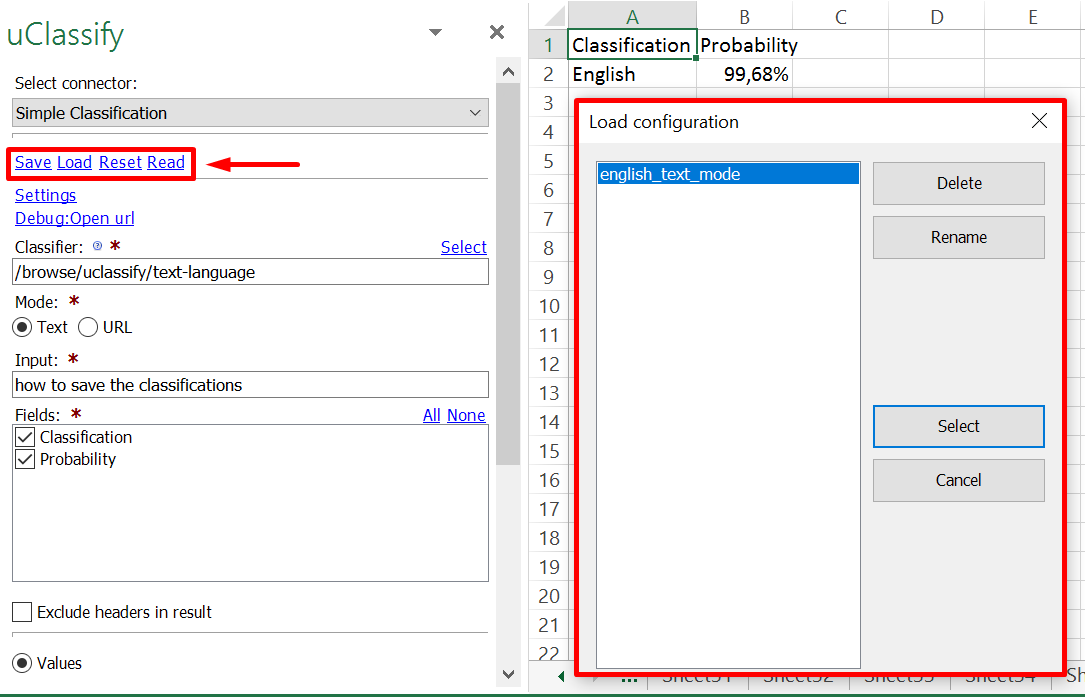
Exporting and filtering Excel data from web based platforms takes time, especially if it’s required on a daily or weekly basis. The filtering part of standardized files is also associated with human error. SeoTools solves this with saving and loading of “Configurations”:

Next time, just load a previous configuration and you will get classifications based on the same settings as last time.
Use Formula Mode to supercharge your classification
The beauty of combining uClassify with Excel is the ability to create large numbers of requests automatically. Instead of populating cells with values, select “Formula” before Inserting the results:
Next, you can change the formula to reference a cell and the uClassify Connector will generate results based on the value or text in that cell.
In the following example, company A has been mentioned 100 times on Twitter in the last week and we want to determine the text Language and Sentiment for these tweets.
First, select the Text Language Classifier and enter a random character in the Input field (we will change this in the formula to reference the tweets). Also, don’t forget select “Exclude headers in result” since we only want the values for each row.

When the formula has been inserted in cell C2, change the input “y” to B2, and SeoTools will return the language with the highest probability. Repeat the same steps for the Sentiment classifier, but insert it in cell D2. It should look like this:

To get the results for all rows, select cell C2 and D2 and drag the formula down and SeoTools will generate the classifications for all tweets. In the example below, we’ve started on row 16 to illustrate the results:

Do you want to try it with your uClassify account?
⦁ Sign up for a 14-Day Trial and follow the instructions to download and install the latest version of SeoTools.
⦁ Register your access key under “Upgrade to Pro” and access uClassify in the Connectors menu:

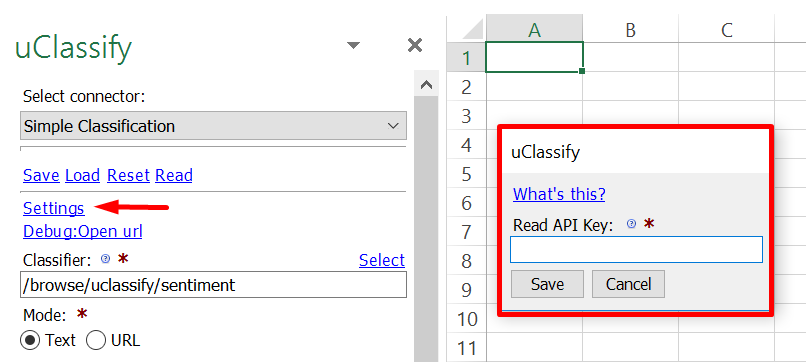
⦁ Next, go to API keys in the top menu of your uClassify account and copy the Read key

⦁ Finally, copy your API-key and paste it in the “Options” menu:
The complete documentation of the uClassify Connector features can be found here.
If you have any questions, feedback, or suggestions about ways to improve the Connector, please contact victor@seotoolsforexcel.com.

